My First Canning Experience – I’m Hooked!

Like many things, I had built up in my mind how canning was going to be a piece of cake. And it could be when you get the hang of it. But not when you’re a newbie canner and it’s 100 degrees outside, and you have to run your stove for hours. Well, needless to say, canning is a sweaty job.

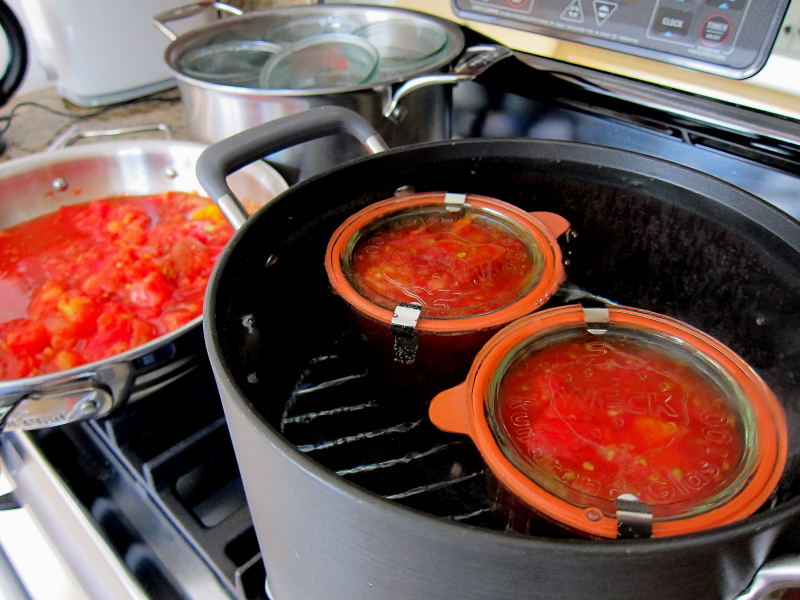
One thing that I learned is that it is very useful to have a pot of boiling water nearby in case the amount of water in the pot starts to dip down. I used fancy Weck jars for my canning. What can I say – the cute strawberry logo was irresistible, not to mention the fact that Weck is known for their jars.

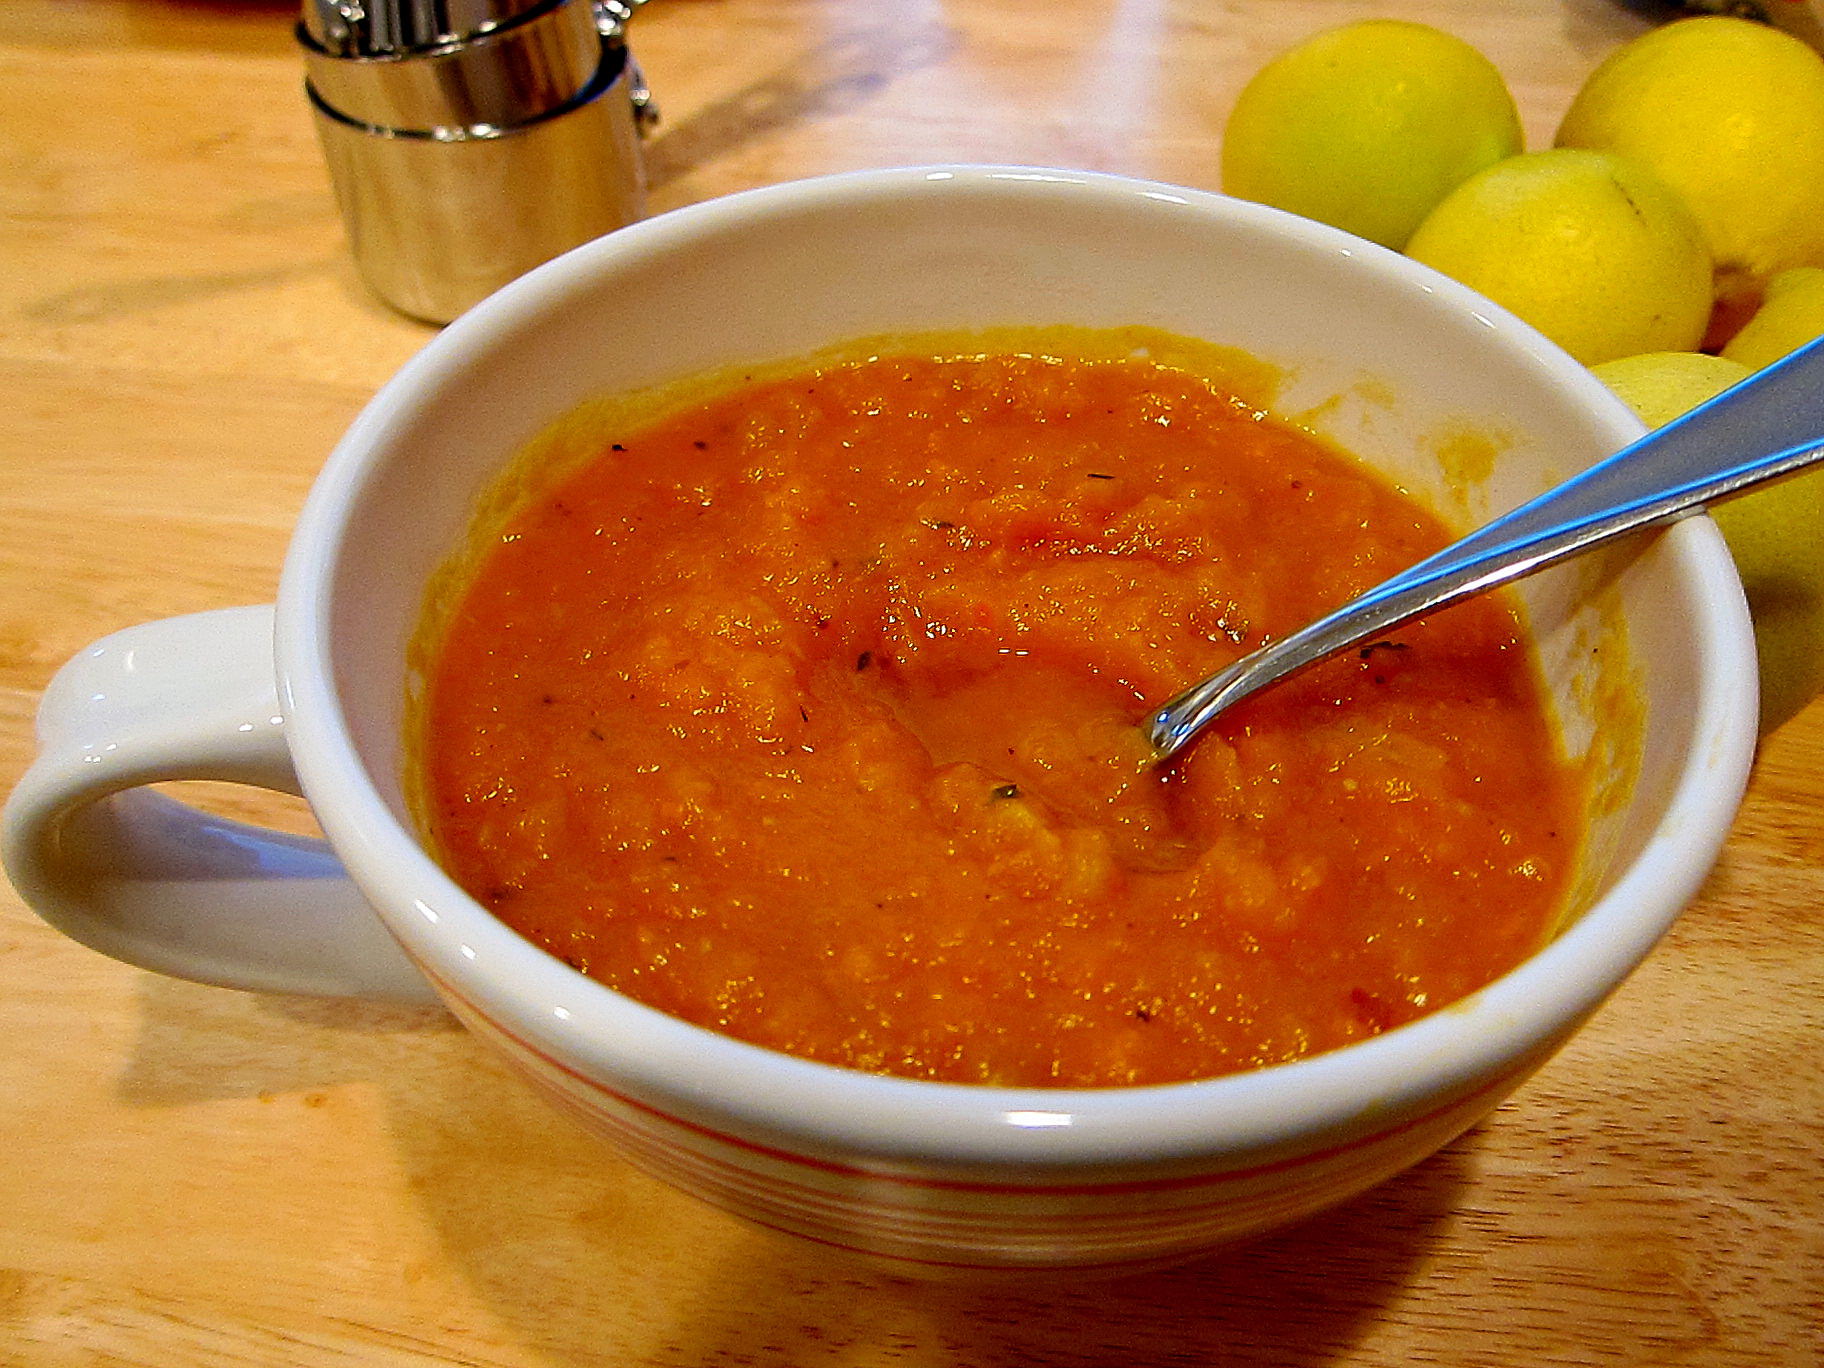
I started out with a recipe for what I thought would make tomato sauce from the Ball canning guide. It ended up being more like tomato soup and never really reduced to a thick consistency.

Tomato basil0001

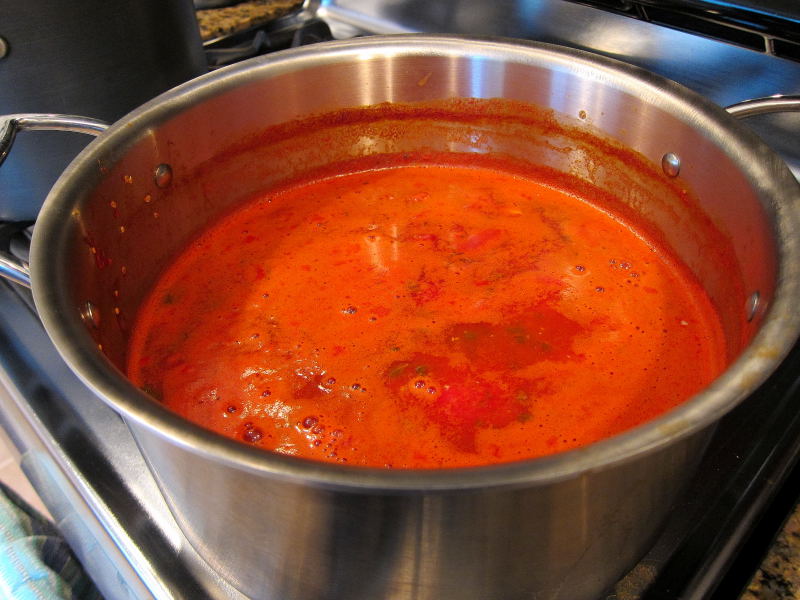
I was slightly disheartened. But for lunch today I decided to open up a sealed jar (fearing that I had not properly canned the first batch, I had stuck them in the refrigerator with the intent of eating them soon). Oh my stars, it was delicious as a soup! I threw some large hunks of stale bread in there, too.

My kitchen was a bit of a disaster during the entire process and the stove became a tad bit crammed, but I made it work…
crazy stove0001

I’ve now decided that I want to can everything. Except for meat – I don’t understand why people do this. Someone must be doing it if the Ball canning guide has recipes for it!

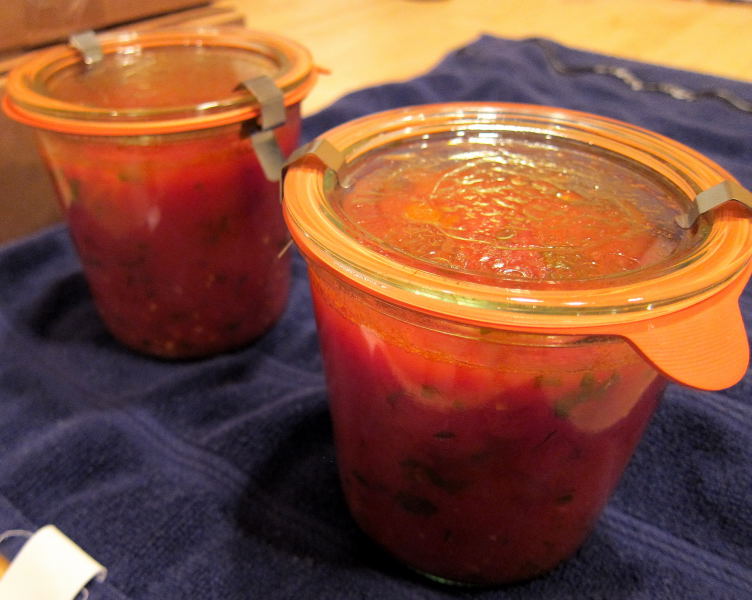
Here’s my finished product. Can’t wait to eat them in the winter!

Finished product0001

Next up – sugar-free peach jam. I’m already readying myself for a hot, sticky mess.

Adventures in Canning

I’m about to enter into new territory for me. I know I’m a little late to the party, but I’m going to give canning a shot. I’m hoping this won’t turn out to be a disaster as I’ve scurried all around town to find various canning supplies. Who knew that finding a canning rack was near impossible? I’ll be sharing my first canning experience shortly…

Pan o’ chicken enchiladas

2 enchilaladas0001
Making a great enchilada sauce can be very time consuming. Maybe one day I’ll attempt to perfect a recipe. In the meantime, I use store bought salsa for a tasty substitute. Continue reading

Tip: how to unstick sticky honey

From time to time, I bake or cook with honey. It’s a great substitute for sugar, but I often wonder how much of the honey I’ve left behind in the measuring spoon/cup since it naturally sticks to surfaces.

Here’s a tip: spray or wipe down your spoon/cup with any kind of oil or butter, and then measure out the honey. The honey will slide right out of your spoon/cup and into your bowl. Using some oil or butter makes cleaning up the honey much easier and you won’t wonder how much extra honey you need to add to make up for the amount left behind!

Butternut Squash Tart

This past summer I planted butternut squash in my garden for the first time. Oh my stars, they were the most delicious squashes I have ever tasted. The depth and sweetness in flavor were surprising to me. My palate could also be colored by the fact that it came from my garden, but that is beside the point.

I tried out this recipe from Epicurious: http://www.epicurious.com/recipes/food/views/Butternut-Squash-Tart-with-Fried-Sage-51117300

I served it as a Thanksgiving pre-game warm-up and it got devoured (mostly by me). I changed it up a little though and made a pastry dough instead of using puff pastry. Although puff pastry is very easy to work with, it can buckle under the weight of food, especially while it sits on a table waiting to be eaten. And, next time I will add whole wheat flour and more chilis (I like some heat!).

This recipe is a definite fixture in my future party planning.

image_1

Pumpkin Soup

Pumpkin soup

Pumpkins are not just for carving and leaving them to die on one’s doorstep. I had bought a few sugar pie pumpkins a few months back for stuffing with chunky croutons and cheese. I had one that lingered in my kitchen though, and on this grey day (at least in my neck of the woods) soup sounded just perfect.

You’ll need:

  • 2-3 lb sugar pie pumpkin, cut into large cubes
  • 2 cups of sweet potatoes, cubed
  • 1 large russet potato
  • 5 cups of low-sodium stock, chicken or vegetable
  • 1 cup of yellow onion, chopped
  • 2 tsp garlic
  • 1 tsp ginger
  • 1 tsp cumin
  • 1/4 tsp cayenne pepper
  • salt and pepper
  • olive oil

To make:

Pre-heat your oven to 400 degrees.

First roast the pumpkin, sweet potatoes, and potato. Make sure to cut up everything into similarly sized pieces. I find it easier to leave the pumpkin’s skin on and cut it off later, but peel the other tubers. Toss the cubes with 2 tablespoons of olive oil. Lightly sprinkle salt and pepper. You can even omit the salt entirely if you wish. The broth will add enough saltiness to the soup.

Roast for 45 minutes and toss the cubes halfway through the process to bake evenly. Pull out and set aside.

Meanwhile, chop the onions, garlic, and ginger. After the cubes have sufficiently cooled, peel off the pumpkin skin.

On medium heat, saute the onions, garlic, and ginger with olive oil for 3 minutes. Add in all of your cubes, 4 cups of stock, cayenne, and cumin. Let simmer for 15 minutes. (I also had thrown in some leftover sweet potatoes that I had roasted earlier with thyme and garlic, but I think the soup would taste just as good without the thyme.)

Turn down the heat to low or off. You can use an immersion blender or transfer everything to a blender or food processor. Blend it all together. Add the additional cup of stock (or more) if necessary, depending on how soupy you like it. Season with additional salt and pepper if desired.

You can certainly substitute a cup of cream for the stock. I left it out, however, in a baby-step attempt to detox from the holidays.

If you are planning to plant a summer/fall garden, don’t forget to keep some of the pumpkin seeds for use later.

Asparagus with Herbs and Anchovies

If you don’t like anchovies, this recipe is definitely not for you. Somewhere I had seen a recipe that used a “salsa” of many herbs and anchovies. I wish I could find it again and post it, but lacking that I created a variation on that mixture.

My version of this salsa was more to taste than exacting. I julienned basil and chopped cilantro, parsley, arugula, and rosemary. I then chopped half a can of anchovies and added those with about 1/2 a tablespoon of olive oil. You can certainly use the oil from the anchovy can – I have also tried that, too. Add some freshly ground pepper, mix your herbs and anchovies together, and you’re done with the salsa. You can add salt, but I find it unnecessary because of the salty anchovies.

Next, I chopped a bunch of asparagus into bite-sized pieces (and I had snapped the stems off before chopping). I sauteed them with olive oil and garlic only for a few minutes so that the asparagus was still crunchy, but not soggy.

Then, I married the salsa with the asparagus. Very easy to do and very flavorful. I have also tried the salsa with roasted broccoli, which I think tastes even better.

Pasta sauce with shredded carrots and zucchini

Image

Who knew that shredded carrots could be entirely exciting in pasta sauce??? Mario Batali, that’s who. In the last issue of Lucky Peach I came across one of his recipes for pasta sauce. To it, he adds shredded carrots, which give the sauce some fun texture and subtle carroty flavor. I had some zucchini and threw that in as well. I didn’t have time to make his sauce so I just mixed the shredded veggies into a bottled sauce. Give it a try!

Spring cleaning (freezer edition): buffalo burgers

Apart from my pantry, my freezer is an entirely different beast to tame. There are times when I don’t want to, and can’t, pull things out of my freezer because I just know everything will come tumbling out of it. Feeling brave, however, I recently pulled the close-to-freezer-burned package of ground buffalo out of there. I have never eaten buffalo, which is exactly the reason why I left it in there for so long. In fact, I only recently started to eat meat after a 12 year hiatus so I also felt a little shy about it.

I had been thinking for some time about what to do with the ground buffalo. I kept wondering if I would even like it. In the end, I made buffalo burgers. I diced half a yellow onion, added a few teaspoons of pepper and salt, and an egg – that was about it. On top, I melted a few slices of cheddar.

I have to say, the buffalo burger wasn’t all that bad. Without having a memory of what beef tasted like, it is hard for me to describe what buffalo tasted like. I can only say that the meat was not that greasy and that the flavor was rich and a tad bit smokey. Although my overall experience with buffalo wasn’t bad, I can’t say that I’ll be making more space in my freezer for it.


Spring cleaning: whole wheat mac and cheese

Macaroni and cheese is a dish that I drool over. The problem is that I don’t often have the time to make a big production out of it by melting the butter, adding flour, etc. I did, however, have on hand a box of whole wheat elbow macaroni in my pantry and some extra-sharp cheddar. So, I opted to make a very simple version of mac and cheese. A relative of mine makes it this way – with just pasta, cheese, milk, and pepper – and it is so good that I really don’t miss the added fat and calories of butter and flour. The cheese that goes into this dish has enough creaminess for me.

What you’ll need:

  • one 16 ounce box of whole wheat elbow macaroni (you can certainly use another kind of pasta such as penne or shells)
  • 3/4 of a pound of cheese (you can use any kind really, but I like to use a sharp cheddar cheese)
  • 1 teaspoon of paprika
  • 2 teaspoons of pepper
  • 1 cup of milk

Preheat your oven to 350 degrees.

Cook the pasta to al dente. Drain and let it cool. While you’re waiting for it to cool, cut the cheese into blocks, or you can grate the cheese, whichever you prefer. Toss your pasta and cheese together, also adding 1/2 cup of milk, pepper, and paprika. Then, place it all into a 9×13 baking dish and cover it. 20 minutes later, your cheese will be fully melted and delicious looking. Add 1/2 cup of milk and mix everything around, making sure you evenly mix the cheese with the pasta. 10 minutes later, take off the cover and let the top brown for the last 15 minutes. You can also mix it around and add any more milk if the mixture looks like it’s drying out.

Adding the paprika really brought out the whole-wheat taste in the pasta. If you don’t want to enhance the whole-wheat taste, and are really just using the pasta as a vehicle for the cheese, then feel free to omit the paprika and certainly add more cheese.